GUESTBOOK
Interactivity draws many users to a site and by allowing your users to post comments you not only
gain feedback on your site but let others view this feedback. Our Guestbook
system gives you these options.
Setting up a Guestbook
You will need to activate your
Guestbook by logging into your Site Manager, scrolling down the page
and clicking on the "Guestbook" link. You will then be taken to a page where you can either activate or edit your
Guestbook.
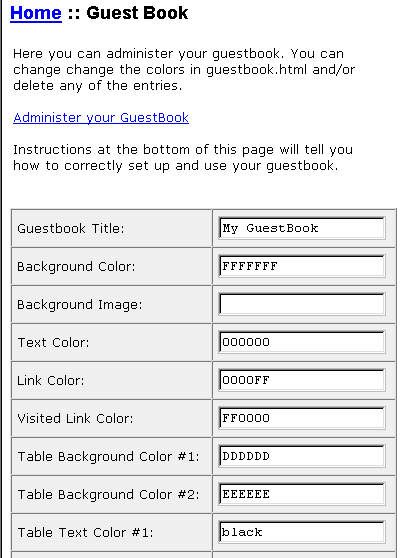
You have several options for your Guestbook:
-
Administer your Guestbook: this allows you to delete any old threads for content or to save on disk space.
-
Name of your Guestbook: this will be the name used on the Guestbook pages and as your
Guestbook's title.
-
Background Color: this will be used as the background for all your Guestbook pages.
-
Background Image: this will be used as the background image for all your Guestbook
pages.
-
Text Color: this will be used as the standard text color on all Guestbook pages.
-
Link Color: this will be used as the standard link color on all Guestbook pages.
-
Table Background Color #1: this will be used as the background color for your
Guestbook table header.
-
Table Background Color #2: this will be used as the background color for your
Guestbook general table.
-
Table Text Color #1: this will be used as the text color for your Guestbook table header.
-
Table Text Color #2: this will be used as the text color for your Guestbook general table.
-
Visited Link Color: this will be used as the standard visited link color on all
Guestbook pages.
-
Header html: this allows you to add any desired html to the top of all Guestbook
related web pages.
-
Footer html: this allows you to add any desired html to the bottom of all Guestbook
related web pages.

Once you have chosen all your settings, click the "Update Guestbook Settings" to make the settings take effect and to activate your
Guestbook. To link to your Guestbook, simply copy the code provided at the end of the
Guestbook setup page. You can edit this code however
you want. You also can create your own custom page for people to enter their
Guestbook entries.
Please note that you need to
refresh (reload) the Guestbook page to see the your own posts. Some of
our members also put a refresh notice on their guestbook page for their
visitors.
Admin Features
The Guestbook feature comes with an admin section as well. In this section, you can delete
any and all messages posted to your guestbook. To reach the Admin section simply go to your
guestbook configuration page as explained above and click the Admin link. You will then see
each message and a checkbox next to it. Click the checkbox of any messages you wish to delete
and then click the delete button and messages will be removed.
![[Guestbook Admin Image]](https://www.budgethostingweb.com/_images/sites/guestbook-admin.gif)
Return to the main
index

|